Burgundy kitchen cabinets aren’t for the faint of heart, but if you’re looking to move past another white or gray kitchen, this deep, wine-inspired hue delivers drama and warmth in equal measure. Once dismissed as dated, burgundy is staging a serious comeback, anchored by rich tones that pair well with brass hardware, natural wood, and even modern minimalist finishes. Whether you’re tackling a full cabinet replacement or considering a DIY paint refresh, burgundy demands thoughtful planning around lighting, countertop pairings, and finish quality. This guide walks through design considerations, color selection, material pairings, and a practical refinishing process for homeowners ready to commit to a color that makes a statement.
Table of Contents
ToggleKey Takeaways
- Burgundy kitchen cabinets deliver dramatic warmth and sophistication in 2026, moving beyond dated cherry tones with deeper, matte finishes that pair beautifully with brass hardware and natural wood.
- Proper lighting and cabinet material quality are critical—solid wood or plywood works best for burgundy since imperfections show more on dark colors, while good lighting prevents the hue from feeling cramped.
- Choose warm burgundies (red-brown undertones) for traditional kitchens with wood elements, or cool burgundies (purple undertones) for modern spaces, and always test swatches in actual lighting conditions.
- Pair burgundy cabinets with simple, neutral countertops and backsplashes—white quartz or gray granite work best—to let the cabinetry color take center stage without visual competition.
- DIY refinishing takes 20-30 hours and requires proper prep (deglazing, sanding, priming) and multiple coats of high-quality cabinet paint for even coverage and durability.
- In modern kitchens, use burgundy as an accent color on islands or perimeter sections paired with white or light gray to create focal points without overwhelming open-concept layouts.
Why Burgundy Kitchen Cabinets Are Making a Comeback in 2026
The return of burgundy cabinets isn’t random, it’s a reaction to years of neutral fatigue and a renewed interest in color that feels grounded rather than trendy. Unlike the bright cherry cabinets of the 1990s, today’s burgundy leans deeper and more sophisticated, often mixed with matte or satin finishes rather than high-gloss lacquer.
Designers are gravitating toward burgundy because it offers depth without darkness. In kitchens with ample natural light or well-placed recessed lighting, burgundy reads as warm and inviting. In smaller or poorly lit spaces, it can close in fast, so lighting assessment is critical before committing.
Another factor: material quality shows in dark colors. Any imperfection, dents, uneven paint, cheap veneer peeling, becomes more visible on deep hues. That’s why burgundy works best on solid wood cabinets or high-quality plywood construction. If existing cabinets are particleboard or have water damage, replacement beats refinishing.
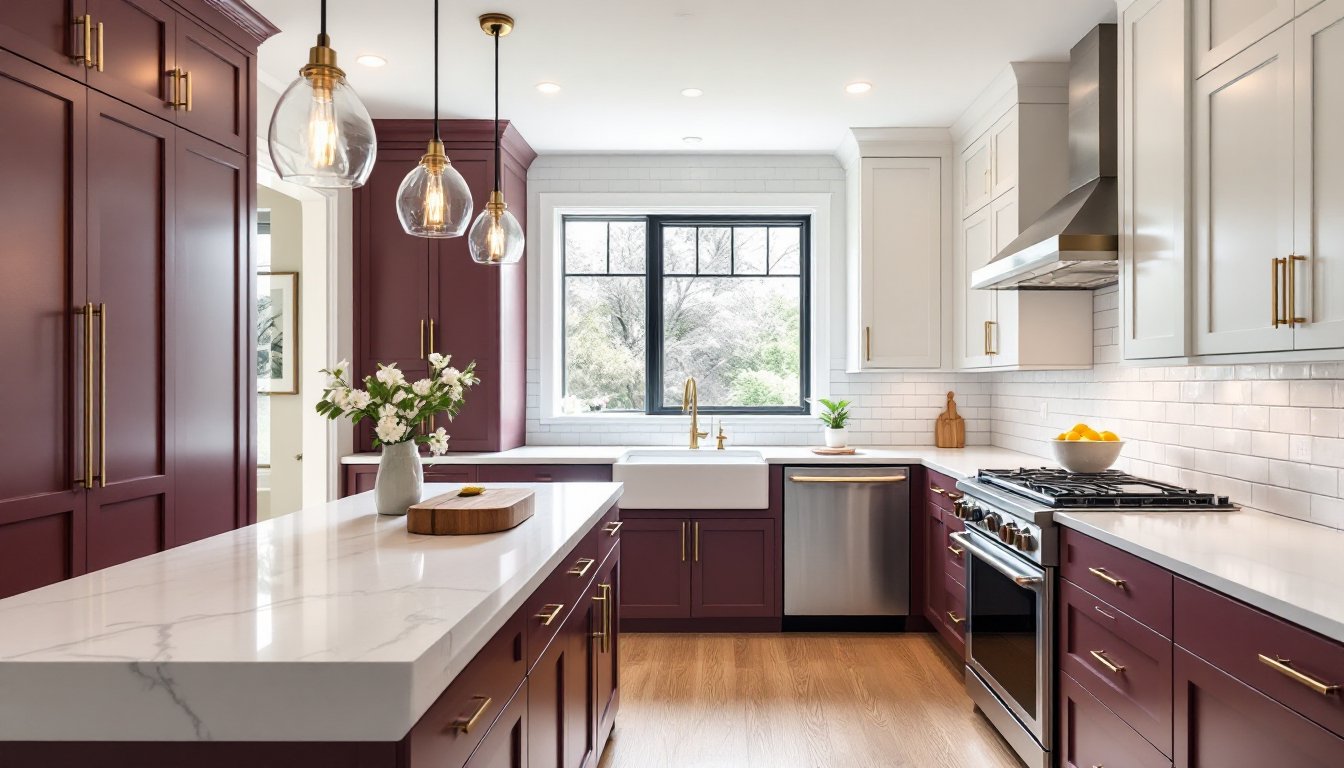
Burgundy also pairs naturally with mixed metal trends. Brass, copper, and oil-rubbed bronze hardware all complement the warm undertones in burgundy stains and paints, giving homeowners flexibility in finishes. The color works in both urban apartments and traditional farmhouse settings, as long as surrounding materials are chosen with intention.
Best Design Styles for Burgundy Kitchen Cabinets
Burgundy is versatile, but it shines in certain design contexts more than others. Matching the cabinet color to the overall style prevents the space from feeling disjointed.
Traditional and Classic Kitchens
Burgundy feels at home in traditional kitchens with raised-panel doors, crown molding, and decorative corbels. Pair it with granite or marble countertops in cream, tan, or soft gray to keep the look grounded. Subway tile backsplashes in white or ivory provide contrast without competing for attention.
In classic settings, burgundy cabinets often work best on lower cabinets only, with upper cabinets in a contrasting cream or off-white. This two-tone approach prevents visual heaviness and keeps sightlines open. It’s especially effective in kitchens with 8-foot ceilings where full-height dark cabinetry can feel oppressive.
Hardware in antique brass or bronze completes the traditional look. Avoid overly ornate pulls, simple bin pulls or cup handles in a warm finish let the cabinet color take center stage. If the kitchen includes a range hood, consider a wood or plaster hood painted to match the walls rather than the cabinets, which breaks up the color mass.
Modern and Contemporary Spaces
Burgundy in modern kitchens requires restraint. Opt for flat-panel (slab) doors with minimal or integrated hardware. The clean lines prevent the color from reading as dated. Pair with countertops in white quartz, concrete, or even black granite for high contrast.
In contemporary designs, burgundy often appears as an accent color on an island or a single wall of cabinets, with perimeter cabinets in white, light gray, or natural wood. This approach works well in open-concept layouts where the kitchen flows into living spaces, it creates a focal point without overwhelming the room.
Consider matte or satin finishes rather than gloss. High-gloss burgundy can veer retro in modern spaces, while a matte finish feels current and sophisticated. Lighting is critical here: under-cabinet LED strips and pendant lights over the island ensure the color doesn’t fade into shadow.
For a bold move, pair burgundy cabinets with stainless steel appliances and minimalist fixtures to emphasize the industrial-modern contrast. Open shelving in natural wood or black metal also balances the richness of the cabinetry.
Choosing the Right Burgundy Shade for Your Kitchen
Not all burgundies are created equal. The wrong shade can make a kitchen feel like a wine cellar or a 1980s dining room. Start by understanding undertones.
Warm burgundies lean toward red-brown, often with hints of rust or terra cotta. These work well in kitchens with wood floors, copper accents, or warm-toned backsplashes. They feel earthy and grounded.
Cool burgundies have more purple or plum undertones. These pair better with gray, white, or black elements and work in modern or transitional kitchens. Cool burgundies can feel more formal and less rustic.
Test paint samples or stain swatches in your actual kitchen. Paint at least a 2×2-foot section on a sample board or directly on a cabinet door, then observe it at different times of day. Morning light, midday sun, and evening artificial light all shift how burgundy appears.
If staining, remember that base wood color affects the final result. Burgundy stain on oak will look different than on maple or cherry. Oak’s open grain absorbs more stain, producing a darker, more varied appearance. Maple’s tight grain resists stain, resulting in a lighter, more uniform color. For consistent results, consider a gel stain, which sits on the surface rather than soaking in.
For painted finishes, start with a high-quality primer. Sherwin-Williams’ Extreme Bond Primer or Benjamin Moore’s Advance Primer ensures even coverage and adhesion, especially over existing finishes. Top with two coats of a durable cabinet paint in your chosen burgundy.
Homeowners looking for inspiration can browse real-world examples of burgundy cabinets to see how different shades perform in various settings and lighting conditions.
Pairing Burgundy Cabinets with Countertops and Backsplashes
Burgundy cabinets set the tone, but countertops and backsplashes either elevate the design or drag it down. Balance is key.
Countertop options:
- White or cream quartz: Provides high contrast and keeps the kitchen from feeling too dark. Brands like Caesarstone or Cambria offer durable, low-maintenance options with subtle veining that adds interest without competing.
- Gray or black granite: Anchors the burgundy and works well in both traditional and modern kitchens. Look for slabs with flecks of burgundy, cream, or gold to tie the palette together.
- Butcher block: Warm wood countertops in maple or walnut add texture and soften the formality of burgundy. Expect regular maintenance, oil every few months and resand as needed to prevent water damage.
- Soapstone: For a more muted, historic look, soapstone’s dark gray surface complements burgundy without competing. It develops a natural patina over time and requires periodic mineral oil application.
Avoid busy granite or quartz with heavy patterns. Burgundy is already a strong visual element: a chaotic countertop creates visual noise.
Backsplash strategies:
- White subway tile: Classic, affordable, and timeless. A 3×6-inch subway tile in white or off-white with gray grout keeps attention on the cabinets.
- Neutral stone tile: Travertine, marble, or limestone in soft tans or grays adds texture without distraction.
- Metallic accents: Copper or bronze backsplash tiles (used sparingly) can echo hardware finishes and add warmth. Use these as accent strips rather than full coverage.
- Solid slab: For a modern look, extend the countertop material up the wall as a full-height backsplash. This works especially well with quartz or soapstone.
Skip colorful or patterned backsplashes. Burgundy cabinets already provide the color focal point, competing patterns dilute the impact. Keep the backsplash simple and let the cabinetry do the talking.
How to Paint or Refinish Cabinets in Burgundy
Refinishing cabinets in burgundy is a multi-day project that requires patience and the right materials. Rushing leads to drips, uneven color, and premature wear.
Tools and materials needed:
- Deglosser or TSP (trisodium phosphate) for cleaning
- Sandpaper: 120-grit and 220-grit
- Tack cloth or microfiber rags
- High-quality primer (shellac-based for stain blocking, or bonding primer for adhesion)
- Burgundy cabinet paint or gel stain
- Foam rollers (4-inch, fine-nap) and angled brushes (2-inch)
- Painter’s tape and drop cloths
- Screwdriver and labeled bags for hardware
- PPE: Safety glasses, nitrile gloves, and a respirator if working indoors without ventilation
Step-by-step process:
-
Remove all cabinet doors, drawer fronts, and hardware. Label each piece with painter’s tape and a number corresponding to its location. This prevents mix-ups during reinstallation.
-
Clean all surfaces thoroughly. Use a deglosser or TSP solution to remove grease, grime, and cooking residue. Wipe down with clean water and let dry completely, at least 2 hours.
-
Sand all surfaces with 120-grit sandpaper. You’re not stripping the finish, just scuffing it to improve primer adhesion. Sand in the direction of the wood grain. Wipe away dust with a tack cloth.
-
Apply primer. Use a foam roller for flat areas and an angled brush for edges and details. Two coats are often necessary, especially over dark existing finishes or wood with tannins (like oak or cherry) that can bleed through. Let each coat dry per manufacturer’s instructions, typically 4-6 hours.
-
Sand lightly between primer coats with 220-grit sandpaper. This smooths out any roller texture. Wipe clean.
-
Apply the first coat of burgundy paint or stain. For paint, use a foam roller and brush combo. For gel stain, apply with a brush or rag, working in small sections and wiping excess. Stain typically requires fewer coats but needs 24 hours between applications.
-
Apply a second (and possibly third) coat. Dark colors like burgundy often need multiple coats for even coverage. Inspect under strong light, any streaks or thin spots will be obvious once installed.
-
Let cure fully before reassembling. Paint typically cures in 7 days, though it may feel dry to the touch sooner. Stain with a topcoat (polyurethane or polycrylic) needs 24-48 hours between coats and 72 hours final cure time.
-
Reinstall doors, drawer fronts, and hardware. Check alignment and adjust hinges as needed. Replace old hinges if they’re worn or mismatched.
Pro tips:
- Work in a well-ventilated space or outdoors if weather permits. Paint fumes and stain odors are intense in enclosed areas.
- For consistent color, buy all paint or stain from the same batch (check batch numbers on cans).
- If painting over existing dark cabinets, a gray-tinted primer helps burgundy cover more evenly than white primer.
- Consider upgrading hardware at the same time. New pulls or knobs are inexpensive and make a big visual impact alongside a fresh color.
Refinishing is labor-intensive but far cheaper than replacement. Expect to invest 20-30 hours for a full kitchen, plus drying time. Many designers recommend sample projects before tackling an entire kitchen to test techniques and color accuracy.
If the existing finish is heavily damaged, consider hiring a professional cabinet painter. A pro spray finish provides a smoother, more durable result than DIY brush-and-roll, though it costs significantly more, typically $3,000–$8,000 for an average kitchen, depending on region and cabinet count.