Deck railing balusters, often called spindles, are the vertical infill pieces between your top and bottom rails that keep people safe while adding visual appeal to your outdoor space. They’re not optional decorative elements: they’re a code-required safety feature. Whether you’re replacing worn-out wood spindles or upgrading to low-maintenance materials, understanding your options and installation requirements will save you time, money, and potential headaches with your local building inspector. This guide walks through material choices, code compliance, and the installation process so you can tackle this project with confidence.
Table of Contents
ToggleKey Takeaways
- Deck railing balusters are code-required vertical infill pieces that prevent falls and provide structural support, with a critical 4-inch sphere rule ensuring no opening allows passage of a child’s head or torso.
- Material choices for balusters range from affordable pressure-treated wood ($1.50–$3 per piece) to durable aluminum and composite options ($3–$8 per piece), each offering different maintenance requirements and aesthetic appeal.
- Building code requires railings be 36 inches tall, balusters spaced maximum 3.5 inches apart (face to face), and the system withstand 200-pound concentrated loads, making it essential to verify local jurisdiction requirements before installation.
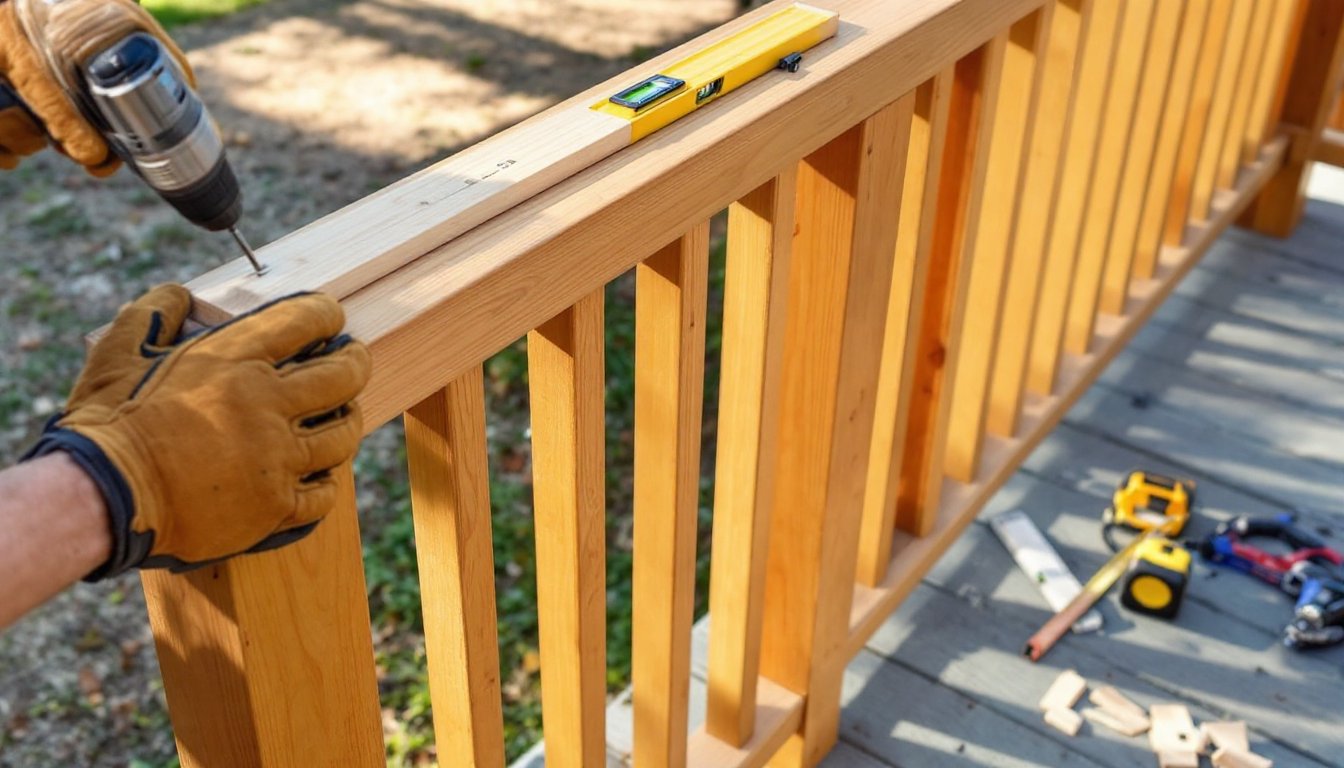
- Proper installation of deck railing balusters involves creating a spacing jig for consistent gaps, pre-drilling pilot holes to prevent splitting, securing each baluster with two screws at top and bottom, and verifying plumb alignment before fastening.
- Avoiding common mistakes like skipping the spacing jig, over-tightening fasteners, and installing before rails are secure ensures your deck meets safety codes and maintains long-term structural integrity.
What Are Deck Railing Balusters and Why Do They Matter?
Balusters are the vertical members that fill the space between the top rail and bottom rail (or deck surface) of your railing system. They serve two critical functions: preventing falls, especially for children and pets, and providing structural support to the railing assembly.
Most residential building codes require that balusters prevent a 4-inch sphere from passing through any opening in the railing. This standard exists because a child’s head or torso can fit through larger gaps, creating a serious entrapment or fall hazard. The International Residential Code (IRC) enforces this rule for any deck more than 30 inches above grade.
Beyond safety, balusters define your deck’s aesthetic. The material and style you choose, whether traditional turned wood, sleek metal bars, or modern cable rail, sets the tone for your outdoor living space. They’re also a significant portion of your railing material cost and labor time, so choosing wisely matters for both your budget and long-term maintenance needs.
Types of Deck Balusters: Materials and Styles Compared
Wood Balusters: Classic Appeal with Natural Warmth
Pressure-treated pine is the most economical wood option, typically running $1.50–$3 per baluster for standard 2×2 square spindles. Expect to apply a stain or sealant every 2–3 years to prevent rot and UV damage. Cedar and redwood offer natural rot resistance and a richer appearance but cost $3–$6 per piece.
Wood balusters come in square, turned (decorative lathe-cut), or chamfered profiles. Turned balusters add traditional charm but collect water in grooves, accelerating decay if not properly maintained. For DIY installation, wood is forgiving, you can cut to length on-site with a miter saw and secure with galvanized screws or finish nails.
Pro tip: Let wood balusters acclimate to your local humidity for 48 hours before installation to minimize warping after they’re fastened.
Metal Balusters: Modern Durability and Design Flexibility
Aluminum balusters are the most popular metal choice. They’re powder-coated to resist rust, require zero maintenance, and come in dozens of colors and styles, from simple round bars to decorative knuckles and twists. Expect $4–$8 per baluster depending on finish and design complexity.
Wrought iron and steel balusters offer old-world elegance and exceptional strength but demand a higher budget ($8–$15 each) and periodic repainting to prevent rust. These work best with wood or composite rails that can accommodate metal shoe brackets, small mounting hardware that holds each spindle in place.
Metal balusters pair well with composite or PVC railing systems. Many manufacturers offer integrated railing kits that include pre-drilled rails and matching metal spindles, streamlining installation. The tradeoff: metal conducts heat, so south-facing railings can become uncomfortable to touch in direct summer sun.
Composite and Vinyl Options: Low-Maintenance Alternatives
Composite balusters are made from wood fiber and recycled plastic, offering the look of painted wood without the maintenance. They won’t rot, splinter, or require repainting, and they cost $3–$7 per piece. Most composite systems use a sleeve-over-aluminum-core design for added strength.
Vinyl (PVC) balusters are the lowest-maintenance option, they’ll never need paint or stain. But, they’re also the least rigid, so they require closer spacing or reinforced mounting to meet code deflection requirements (more on that in the next section). Vinyl runs $2–$5 per baluster and comes primarily in white or tan.
Both materials can fade or chalk over time, especially in high-UV climates. Check manufacturer warranties: quality products offer 20–25 year fade and stain coverage. If you’re matching an existing composite deck, buying balusters from the same manufacturer ensures color consistency.
Building Code Requirements and Spacing Guidelines
Before you buy a single baluster, confirm your local building code requirements, they vary by jurisdiction, though most adopt or adapt the IRC.
Key code requirements:
- Height: Deck railings must be at least 36 inches tall (measured from the deck surface to the top of the top rail). Some jurisdictions require 42 inches for decks above a certain height.
- 4-inch sphere rule: No opening in the railing, including between balusters, can allow a 4-inch sphere to pass through.
- Load requirements: Railings must withstand a 200-pound concentrated load applied in any direction at any point along the top rail, plus a separate 50-pound load on the infill (balusters).
- Baluster spacing: To meet the 4-inch rule, maximum spacing between balusters is typically 3.5 inches (measured from face to face, not center to center). This accounts for manufacturing tolerances and slight movement.
Calculating baluster quantity:
- Measure the total linear feet of railing (not including posts).
- Convert to inches and divide by the baluster spacing (baluster width + gap).
- Add one extra baluster to account for the starting piece.
Example: For a 10-foot (120-inch) rail section using 1.5-inch-wide balusters with 3.5-inch gaps:
- 120 ÷ (1.5 + 3.5) = 24 balusters, plus 1 = 25 balusters needed
Many seasoned DIYers recommend dry-fitting your first section on sawhorses to confirm spacing before permanently fastening anything. Always round up when buying materials, you’ll need extras for mistakes, and trying to match a discontinued style six months later is frustrating.
If your deck requires a permit (check with your local building department), the inspector will verify baluster spacing and load compliance before issuing a certificate of occupancy.
How to Install Deck Railing Balusters: Step-by-Step Process
Tools and materials you’ll need:
- Tape measure and speed square
- Miter saw or circular saw
- Drill/driver with appropriate bits
- Level (2-foot or 4-foot)
- Exterior-grade screws (stainless steel or coated)
- Spacer jig (you can make one from scrap wood)
- Safety glasses and hearing protection
Step 1: Prepare the rail sections
If you’re working with continuous top and bottom rails, secure them to the posts first. Make sure they’re level and properly fastened, the rails must support the baluster load. For wood rails, pre-drill pilot holes to prevent splitting.
Step 2: Cut balusters to length
Measure the distance between the top and bottom rails (or deck surface and top rail, depending on your design). Subtract 1/8 inch for clearance, this prevents binding and allows for wood movement. Cut all balusters to this length. A miter saw gives the cleanest cuts, but a circular saw with a speed square works fine.
Pro tip: Cut one baluster, test-fit it, then cut the rest. Fixing one mistake is easier than fixing 50.
Step 3: Create a spacing jig
Rip a piece of scrap wood to exactly 3.5 inches wide (or whatever your code-compliant spacing is). This jig ensures consistent gaps without measuring each time. Some pros use a site-built balustrade approach with pre-assembled sections, which speeds up installation on long runs.
Step 4: Install balusters
- Start at one end, placing the first baluster flush against the post.
- Use your jig to position the next baluster.
- Check for plumb with a level before fastening.
- Drive two screws through the top rail and two through the bottom rail (or blocking) into each baluster. For metal balusters, use provided mounting shoes and follow manufacturer instructions.
- Repeat across the entire section.
For wood balusters: Pre-drill pilot holes slightly smaller than your screw diameter to prevent splitting. Use #8 x 2.5-inch exterior screws for 2×2 balusters.
For metal balusters: Most systems use a top and bottom rail with a routed channel or surface-mount shoes. The baluster slides into the bottom shoe, then you secure the top with a set screw or compression fit.
Step 5: Check spacing and code compliance
After installing several balusters, verify spacing with your 4-inch test ball (a softball works). Check that balusters are plumb both parallel and perpendicular to the rail. If you’re off, adjust before moving too far down the rail.
Step 6: Finish and seal (if needed)
For wood balusters, apply a quality exterior stain or sealant within 48 hours of installation. Pay special attention to cut ends, end grain absorbs the most moisture. Two coats on end grain is standard practice.
Common mistakes to avoid:
- Skipping the spacing jig. Eyeballing it leads to inconsistent gaps and code violations.
- Over-tightening screws. This can crack wood or strip composite materials.
- Installing balusters before rails are secure. The rails must be rock-solid first.
- Forgetting to account for post width. Measure rail-to-rail distance, not post-to-post.
If you’re uncomfortable with heights, working on a deck above 10 feet, or dealing with complex angles, hire a licensed contractor. Most deck builders charge $15–$35 per linear foot for complete railing installation, including materials.